This is a tutorial on how to make an envelope invitation using the Die'Sire Create A Card Spring Garden Die from Crafter's Companion
Here is the what they look like completed:

Here is the what they look like completed:

Step 1 – You
will need four circles to complete this project and you can cut out two per A4
sheet of card. Place your die at the top of the A4 card and run through your
die cutting machine once to cut and then once more to emboss

Step 2 – We
now need to create a circle so using your die as the template place it below
the cut out part, line it up and draw around the die with a pencil. It does not
have to be perfect so don’t worry that the pencil outline is slightly larger as
this is going to form the base of your envelope.


Step 3 – Cut
along your pencil lines but at the sides you need to cut in slightly so you
line up with the die cut out line. Again don’t worry, it doesn’t need to be a
perfect circle because this forms the base and will be covered up.

Step 4 – You
will need four of these circles in total so repeat the process another three
times. Using Distress Inks colour the die cut side of the circle. For extra
definition once the ink has dried place the die back over the card and use the
ink again on the embossed areas.

Step 5 –
Fold each circle in half – the die has left an indent to guide you so just
score along this line and fold.


Step 6 – Next
we need to stick them together. Open them all out and have the inked side
facing down. When they are all stuck
together each one will overlap the other and this will create a square shaped
middle. So that we know where to put the glue place them together as shown
here:

Step 7 –
Using a pencil draw a feint line around each overlap (as shown here):

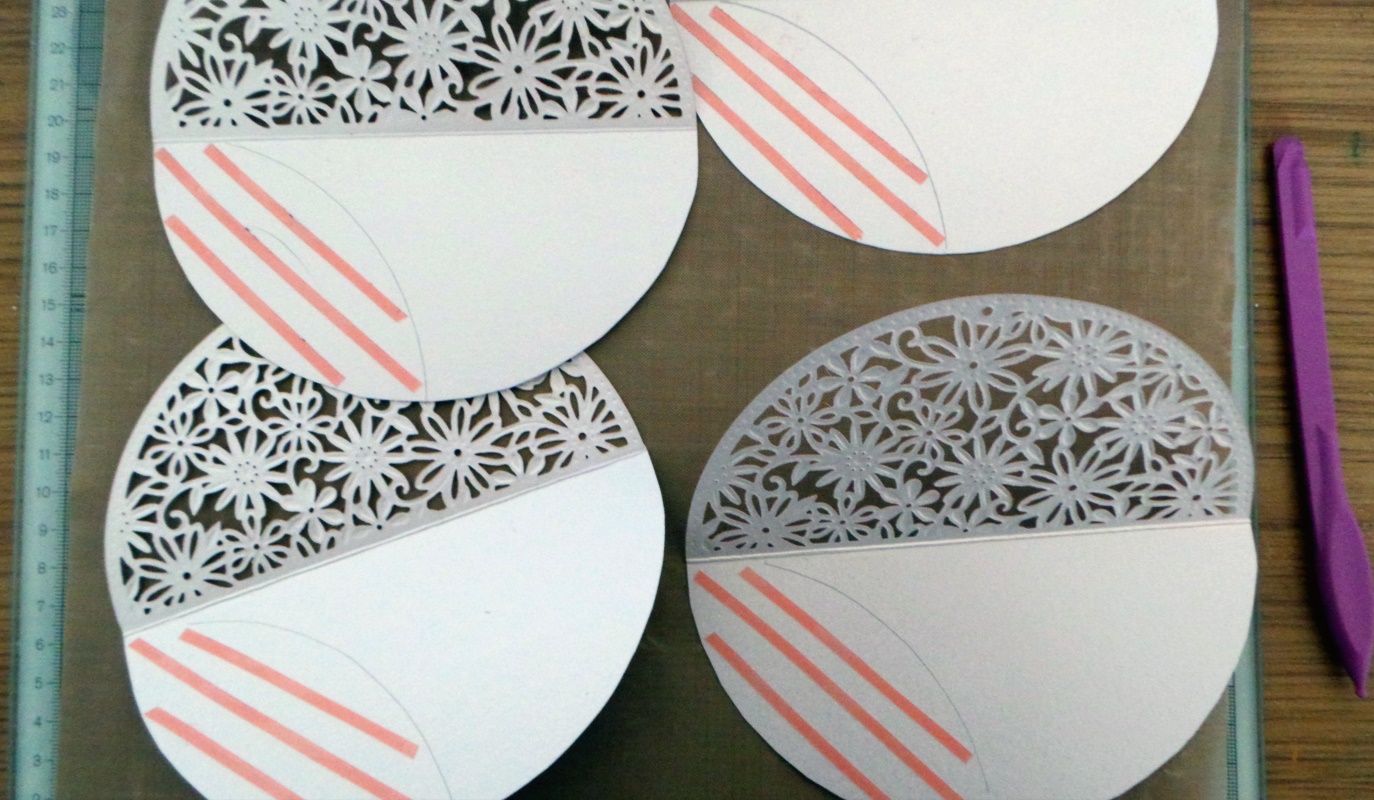
Step 8 –
Separate the circles and add the glue in the small area marked by the pencil
(all your pencil lines should cover the same area on the left hand side of each
circle). I used a couple of strips of red tape and covered the rest of the area
in tacky glue. Put a little tacky glue on the red tape as well so it will help
you to move the circles into position more easily

Step 9 –
Carefully stick the circles together making sure you overlap one circle with
another (use the pencil lines to guide you). The tacky glue will give you a few
minutes to slide the circles into place.

Step 10 – Cut
a piece of patterned or coloured paper 14cm x 14cm and stick this inside the
envelope. Print our stamp your invitation details and stick inside.

Step 11 –
Decide how you want to close the envelope. You can overlap the flaps (as shown
by the blue one), or if you want a flatter card, you can use ribbon (as shown
with the pink one). All that is left is for you to decorate it as you like. For
these I just added pearls.
Thank you for visiting x
Wow Angela these are stunning cards. Thank you for the step by step. They would make wonderful invitations. Have a great week. Hugs Jackie
ReplyDeleteWOW these look amazing. Thanks for the tut :-)
ReplyDeletefantastic project, really got the wow factor.
ReplyDeleteI'm so pleased I found this tutorial, I am looking forward to trying it as I've just got these dies for Xmas. X
ReplyDeleteRemarkable! Its genuinely awesome piece of writing, I have got much clear idea about from this piece of writing.
ReplyDelete